Lab 2: Polymorphism and Collections
 In this lab, you'll implement code that uses polymorphism, select appropriate collection types, and measure performance differences between data structures.
Due: At the end of your scheduled lab section. This is automatically enforced with a 10-minute grace period (in case you finish at the last minute), but push your work regularly—don't wait until the end!
Option 1: Successful Completion
- Complete Parts 1-3 of the lab
- All code compiles and runs correctly
- Push your completed work to GitHub
- Complete the reflection in
REFLECTION.md
Option 2: Partial Credit If you're unable to complete everything:
- Submit a
REFLECTION.mddocumenting what you completed, where you got stuck, and what you tried - A TA will review your submission and award credit for good-faith effort
The Optional Extensions are not required for full credit but are excellent practice if you finish early. You may also resubmit this lab after the due date for feedback (but your grade will not change).
If lab leaders observe that you are not working on the lab during the section, or you leave early AND do not successfully complete the lab, you will receive no marks. However: if you finish the required parts of the lab and want to work on something else, just show the lab leader that you're done, and you'll be all set!
Struggling? That's okay! We are here to support you. If you're putting in effort and engaging with the material, we will give you credit. Ask questions, work with your neighbors, and flag down a lab leader if you're stuck.
Lab Facilitator Notes
Attendance: Take attendance using the roster in Pawtograder. Call each student's name and have them acknowledge.
TA Introductions (2 minutes): Briefly introduce yourselves to the section:
- Your name and year/program
- What you're excited about in CS
Announcement (30 seconds): "If you had any trouble with Lab 1 or your development environment isn't fully working yet, don't worry! We're here to help. As you start working on Part 1, we'll come around and make sure everyone's setup is good to go. Just flag us down if you're stuck."
Student Introductions (3 minutes):
- Have students turn to 1-2 people near them
- Share: name, year, one thing they're working on this semester (can be academic or personal)
- Optional ice-breaker: "What's one thing you've learned in the first two lectures that surprised you or clicked for you? Or that you're looking forward to learning more about?"
This brief connection-building helps students feel comfortable asking each other questions during the lab.
During Part 1: Circulate and check that everyone can clone the Lab 2 repo and run ./gradlew build. Use the Pawtograder dashboard to identify students who didn't complete Lab 1, and prioritize helping them get their environment working.
Learning Objectives
By the end of this lab, you will be able to:
- Implement methods that use polymorphism to operate on objects through supertype references
- Select appropriate collection types (List, Set, Map) based on access patterns
- Measure and compare performance characteristics of different collection implementations
Before You Begin
Prerequisites: Complete Lectures 2-3 and Flashcard Sets 1-2.
If your lab section meets on Monday morning before Lecture 3, please review the Lecture 3 materials. Parts 2 and 3 of this lab rely on concepts covered in Lecture 3 (generics and collections). Lab leaders for early Monday sections will also provide a brief summary of this content after the Part 1 sync point.
You don't need to master everything, but familiarizing yourself with the material will help you get more out of the lab session.
Clone the Lab Repository: Clone your lab2 repository in VSCode (go to clone from github, and select your neu-cs3100/lab2-... repository). The repository includes:
Core Device Classes (net.sceneitall.iot):
IoTDevice.java— interface from lectureLight.java,DimmableLight.java,TunableWhiteLight.java— the light hierarchyFan.java— a separate device typeDeviceGenerator.java— generates test devices for performance measurement
Part 1: Polymorphism (net.sceneitall.iot.lab2.part1):
SmartHomeController.java— controller class with method stubsSmartHomeControllerTest.java— test file with starter tests
Part 2: Collections (net.sceneitall.iot.lab2.part2):
CollectionsExercises.java— where you'll write code for Part 2
Part 3: Performance (net.sceneitall.iot.lab2.part3):
PerformanceExercises.java— where you'll write code for Part 3
Stretch Goals (net.sceneitall.iot.lab2.stretch):
CeilingFanWithLight.java— composition example for Stretch Goal 2StretchExercises.java— generic methods exercise for Stretch Goal 3
Part 1: Polymorphism in Action (10 minutes)
The power of polymorphism is writing code that works with any subtype—even ones that don't exist yet. In this exercise, you'll implement a smart home controller that operates on devices without knowing their concrete types.
Exercise 1.1: Implement a Device Controller
The starter code includes a SmartHomeController class with method stubs. Your task: implement methods that work with any IoTDevice using polymorphism.
public class SmartHomeController {
    private List<IoTDevice> devices;

    public SmartHomeController() {
        this.devices = new ArrayList<>();
    }

    /**
     * Adds any IoT device to the controller.
     */
    public void addDevice(IoTDevice device) {
        // TODO: Implement this
    }

    /**
     * Calls identify() on ALL devices in the home.
     * Each device type will identify itself differently (lights flash, fans spin, etc.)
     */
    public void identifyAllDevices() {
        // TODO: Implement this
        // Hint: You don't need to know what type each device is!
    }

    /**
     * Returns a count of how many devices are currently available (connected).
     */
    public int countAvailableDevices() {
        // TODO: Implement this
        // Use the isAvailable() method from IoTDevice
    }
}
Exercise 1.2: Write JUnit Tests for Your Controller
In SmartHomeControllerTest.java, write JUnit 5 tests that verify your implementation works with a mix of device types. This exercise will help you practice writing tests for Assignment 1.
Example Test 1: Basic Functionality
@Test
void identifyAllDevicesWorksWithMixedDeviceTypes() {
    SmartHomeController controller = new SmartHomeController();

    // Add different device types - they should all work!
    controller.addDevice(new Fan("ceiling-fan"));
    controller.addDevice(new DimmableLight("desk-lamp", 75));  // 75 = startup brightness %
    controller.addDevice(new TunableWhiteLight("living-room", 2700, 100));  // 2700K startup color temp, 100% startup brightness

    // This should not throw any exceptions
    assertDoesNotThrow(() -> controller.identifyAllDevices());
}
Example Test 2: Testing with assertEquals
@Test
void addDeviceIncreasesDeviceCount() {
    SmartHomeController controller = new SmartHomeController();

    // Initially, no devices
    assertEquals(0, controller.getDeviceCount(),
                 "New controller should have 0 devices");

    // Add one device
    controller.addDevice(new Fan("fan-1"));
    assertEquals(1, controller.getDeviceCount(),
                 "After adding 1 device, count should be 1");

    // Add another device (50 = startup brightness %)
    controller.addDevice(new DimmableLight("light-1", 50));
    assertEquals(2, controller.getDeviceCount(),
                 "After adding 2 devices, count should be 2");
}
Example Test 3: Testing Edge Cases
@Test
void countAvailableDevicesOnlyCountsAvailableDevices() {
    SmartHomeController controller = new SmartHomeController();

    // Create devices with different availability states
    Fan fan = new Fan("fan-1");
    DimmableLight light = new DimmableLight("light-1", 100);  // 100 = startup brightness %

    fan.setAvailability(true);   // Available
    light.setAvailability(false); // Not available

    controller.addDevice(fan);
    controller.addDevice(light);

    // Only the fan should be counted as available
    assertEquals(1, controller.countAvailableDevices(),
                 "Should only count available devices");
}
Now You Try: Complete These Tests
@Test
void countAvailableDevicesCountsAllDeviceTypes() {
    SmartHomeController controller = new SmartHomeController();

    // TODO: Add at least 3 different device types (Fan, DimmableLight, TunableWhiteLight)
    // Make sure all are available
    // Use assertEquals to verify the count matches the number you added
}

@Test
void countAvailableDevicesReturnsZeroWhenEmpty() {
    // TODO: Test that a new controller returns 0 available devices
    // Use assertEquals to verify this
}

@Test
void identifyAllDevicesWorksWithEmptyController() {
    // TODO: Test that calling identifyAllDevices on an empty controller doesn't crash
    // Use assertDoesNotThrow
}
Run your Part 1 tests using VS Code's Test Explorer:
- Open the Testing sidebar (flask icon in the left sidebar, or
Cmd+Shift+P→ "Testing: Focus on Test Explorer View") - Expand
SmartHomeControllerTest - Click the play button (▶) next to individual tests or the entire class
You can also run tests from the terminal:
# macOS/Linux
./gradlew test --tests "net.sceneitall.iot.lab2.part1.*"

# Windows
.\gradlew.bat test --tests "net.sceneitall.iot.lab2.part1.*"
Since Parts 2 and 3 aren't implemented yet, running all tests will show failures. The commands above run only Part 1 tests.
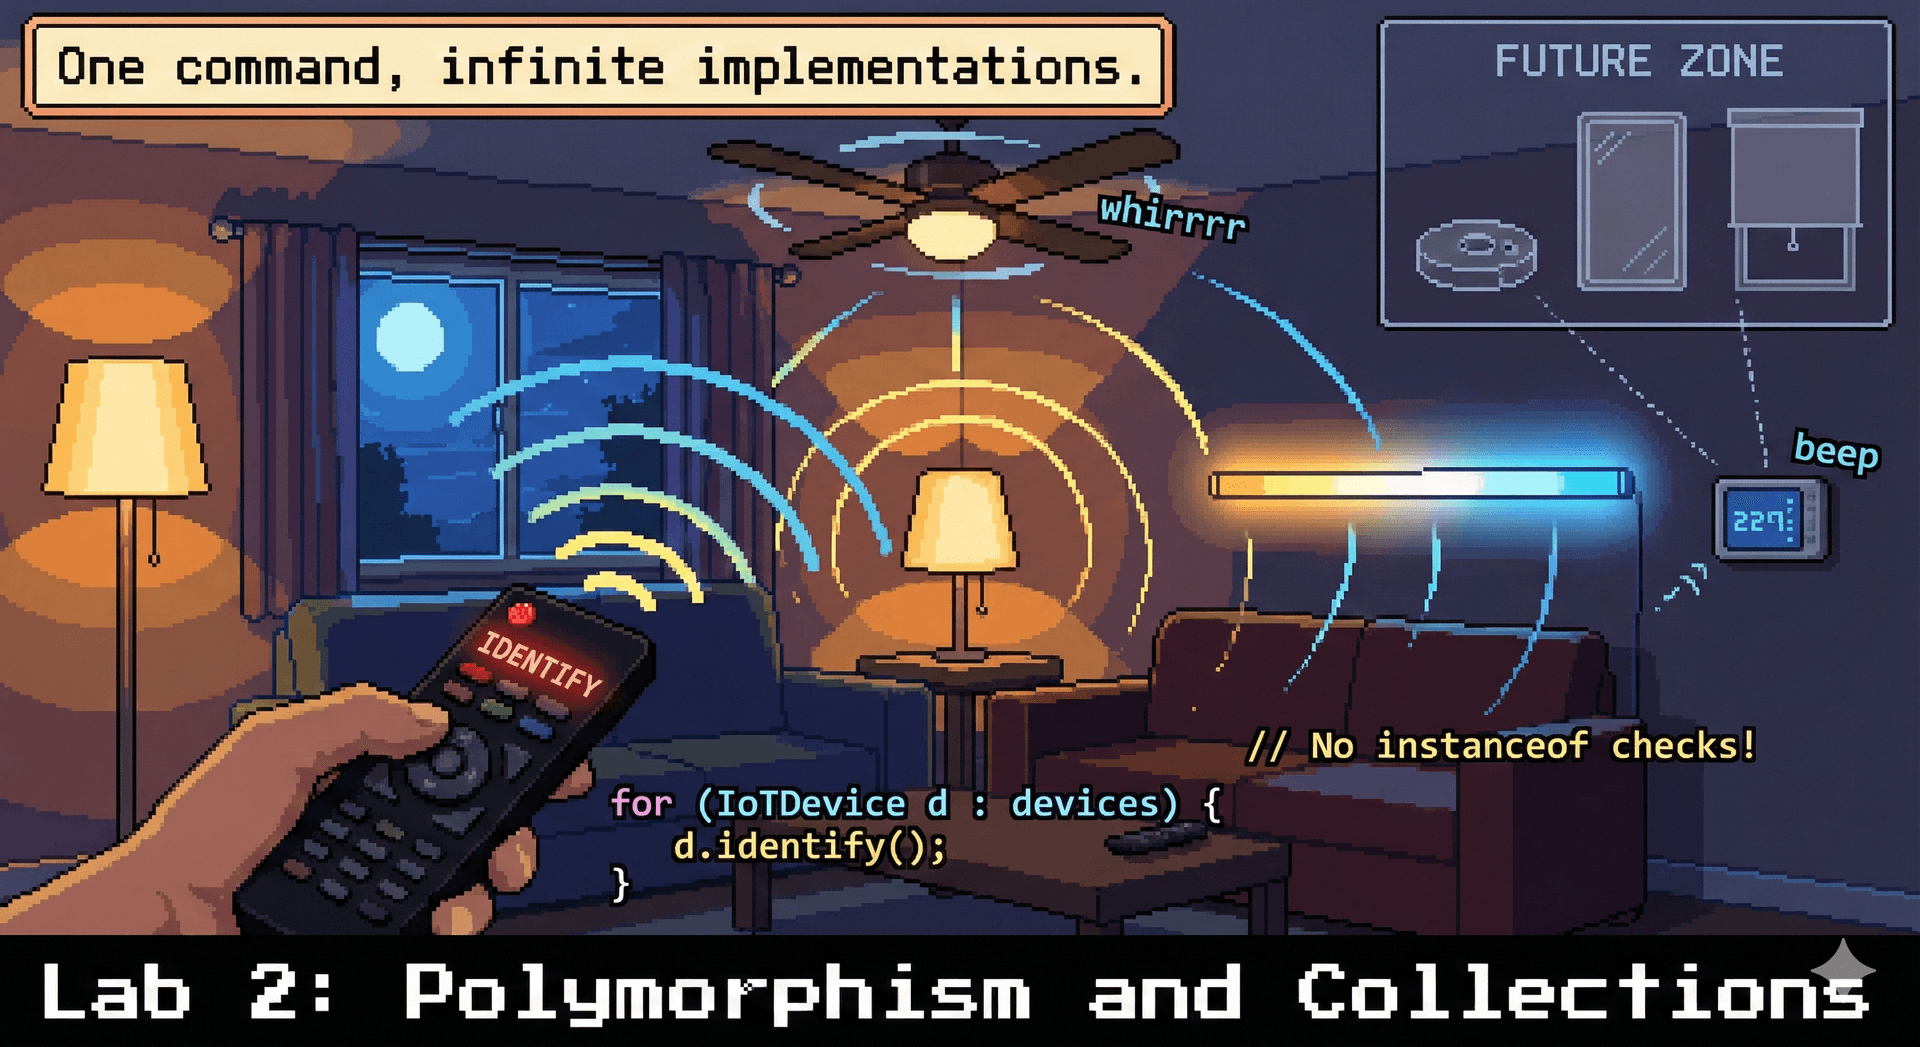
Key insight: Your identifyAllDevices() method doesn't contain any if (device instanceof Fan) checks—it just calls identify() and the JVM figures out which implementation to run. That's polymorphism at work.
Key Testing Concepts for Assignment 1:
JUnit 5 provides many assertion methods. Here are the most commonly used ones:
| Assertion | Use Case | Example |
|---|---|---|
assertEquals(expected, actual, message) | Check if two values are equal | assertEquals(5, list.size(), "List should have 5 items") |
assertNotEquals(unexpected, actual, message) | Check if two values are different | assertNotEquals(0, device.getId(), "ID should not be 0") |
assertTrue(condition, message) | Check if a condition is true | assertTrue(device.isAvailable(), "Device should be available") |
assertFalse(condition, message) | Check if a condition is false | assertFalse(list.isEmpty(), "List should not be empty") |
assertNull(object, message) | Check if an object is null | assertNull(controller.findDevice("missing"), "Should return null") |
assertNotNull(object, message) | Check if an object is not null | assertNotNull(device, "Device should not be null") |
assertThrows(ExceptionType.class, executable) | Verify an exception is thrown | assertThrows(IllegalArgumentException.class, () -> device.setBrightness(-1)) |
assertDoesNotThrow(executable) | Verify no exception is thrown | assertDoesNotThrow(() -> controller.identifyAllDevices()) |
assertSame(expected, actual, message) | Check if two references point to the same object | assertSame(device1, controller.getDevice(0)) |
assertNotSame(unexpected, actual, message) | Check if two references point to different objects | assertNotSame(device1, device2, "Should be different instances") |
Best Practices:
- Always include a descriptive message as the last parameter—it helps when tests fail!
- Put the expected value first, then the actual value:
assertEquals(expected, actual). This makes failure messages clearer. - Use the most specific assertion available (e.g.,
assertNull()instead ofassertEquals(null, obj))
Resources:
Exercise 1.3: Discussion — Design Questions
With a neighbor, discuss these design questions:
Question 1: Why is Light abstract with no abstract methods?
Look at the Light class—it's marked abstract, but it has no abstract methods. Everything is fully implemented!
- Why might we want to prevent someone from writing
new Light("my-light")? - What's the difference between
Lightas a concept vsSwitchedLightas a concrete thing?
Question 2: Why don't we make SwitchedLight the base class?
An alternative design: Make SwitchedLight the base class (not abstract), and have DimmableLight extend it directly.
- What would that imply about the relationship between switched and dimmable lights?
- Is a dimmable light really a "kind of" switched light, or are they siblings?
- What happens if we later want to add a light type that isn't switchable (e.g., always-on indicator light, or one that MUST have a gentle ramp in brightness and can't be discretely controlled)?
Question 3: What makes a "Device"?
Look at the IoTDevice interface:
- What capabilities does
IoTDeviceassume all devices have? - What new device types could easily fit this interface? (thermostats, door locks, cameras, robot vacuums...)
- What might be awkward? (Does a smart speaker "identify" itself the same way? What about a device with multiple components like a fan with a light?)
🔄 Sync Point 1
Lab leaders will pause here for a brief discussion:
- Ask groups: "Why is
Lightabstract if it has no abstract methods?" - Ask groups: "Why not make
SwitchedLightthe base class?" - Preview: In upcoming assignments, you'll design your own class hierarchies. These design decisions matter—the wrong hierarchy creates awkward code later.
Generics and Collections: Essential Concepts
Before we continue, let's review some essential concepts from Lecture 3 that you'll need for Parts 2 and 3. If you've already completed Lecture 3, you may just refer back to this as you go through parts 2 and 3. However, for early Monday sections (where students haven't completed Lecture 3 yet), lab leaders will walk through this content with the whole lab for 5-10 minutes.
Generics: Type-Safe Collections
Without generics (type-unsafe, don't do this):
List devices = new ArrayList();  // Raw type - BAD! Allows any type to be added to the list
devices.add(new Fan("fan-1"));   // Let's add some devices!
devices.add("oops, a string");   // Compiles but wrong if we assume the list contains only fans!

// This will crash at runtime!
Fan f = (Fan) devices.get(1);    // ClassCastException
With generics (type-safe):
List<Fan> devices = new ArrayList<Fan>();  // Type parameter specified
devices.add(new Fan("fan-1"));
devices.add("oops, a string");   // Compile-time error - caught immediately!
Key takeaway: Generics let you catch type errors when you write them, not when you run your code. Always specify type parameters with <>.
The Collections Hierarchy
Java provides three main collection types, each with different characteristics:
| Collection Type | Characteristics | Use When... | Common Implementation |
|---|---|---|---|
| List | Ordered, allows duplicates | You need to maintain order or access by index | ArrayList<T> |
| Set | Unordered, no duplicates | You need to track unique items or check "contains?" | HashSet<T> |
| Map | Key-value pairs, unique keys | You need to look up values by a key | HashMap<K, V> |
ArrayList vs LinkedList:
Java provides two main List implementations, but they work very differently internally:
ArrayListis backed by a resizable array. Random access by index is O(1) (instant), but insertions in the middle require shifting elements.LinkedListis backed by a chain of nodes. Each node points to the next (and previous) node. It excels as a Queue or Deque—adding at the front (addFirst()) or back (addLast()) is always O(1). However, accessing element by index (likeget(500000)) requires walking the chain node-by-node, which is O(n).
Rule of thumb: Use ArrayList by default for lists. LinkedList is only better when you specifically need queue/deque behavior (add/remove at both ends). We'll explore why ArrayList wins in most cases in Lecture 34 (Performance) when we discuss memory access patterns and CPU caching.
Part 2: Collections Selection (10 minutes)
Choosing the right collection type makes your code clearer and faster. In this section, you'll practice matching problems to collections.
Exercise 2.1: Fix the Generics Bug
The starter code contains this problematic snippet in CollectionsExercises.java:
// This code has a bug! Fix it using generics.
public static void demonstrateGenericsBug() {
    List devices = new ArrayList();  // Raw type warning!
    devices.add(new DimmableLight("test", 100));
    devices.add("oops, this is a string");  // No compile error...

    // This will crash at runtime!
    for (Object obj : devices) {
        Light light = (Light) obj;
        light.turnOn();
    }
}
Your task: Fix this code so the compiler catches the bug. The string should cause a compile-time error, not a runtime crash.
After you've fixed the bug: Comment out or remove the line devices.add("oops, this is a string"); so your code can compile and run for the remaining lab exercises. Your fix should make the compiler reject this line—which is exactly what we want! But to continue with the rest of the lab, you'll need to remove it.
Exercise 2.2: Choose the Right Collection
For each scenario below, choose the appropriate collection type and implement a solution in CollectionsExercises.java.
Scenario A: Device Registry
You're building a smart home system that stores devices by their unique ID (like "living-room-main" or "bedroom-fan"). You need to quickly look up a device by its ID.
// TODO: Implement createDeviceRegistry()
// - Choose the right collection type
// - Add at least 3 devices with meaningful IDs
// - Return the collection
Questions to consider:
- Do you need to look up by key or by position?
- Do keys need to be unique?
Scenario B: Devices by Room
You want to track all devices in each room. A room can have multiple devices, and you need to find all devices in a given room quickly.
// TODO: Implement groupDevicesByRoom()
// - What should the key type be?
// - What should the value type be?
// - Add devices to at least 2 rooms
Scenario C: Online Device Tracking
You're tracking which devices are currently online. When a device comes online, you add it. When it goes offline, you remove it. You frequently need to check "is this device online?"
// TODO: Implement createOnlineDeviceTracker()
// - Choose a collection that efficiently answers "contains?" queries
// - Order doesn't matter
Verify your Part 2 code compiles:
# macOS/Linux
./gradlew compileJava

# Windows
.\gradlew.bat compileJava
Interactive Testing with main()
Part 2 doesn't have automated JUnit tests. Why? Because sometimes the fastest way to test during exploratory development is to poke at your code interactively, not to spend time writing exhaustive test suites.
We've provided a main() method in CollectionsExercises.java that demonstrates this approach:
# macOS/Linux
./gradlew runPart2

# Windows
.\gradlew.bat runPart2
This will:
- Print out what collections you created
- Show you their contents
- Give you commented-out code to uncomment as you implement each method
The Philosophy: When you're learning a new library or exploring a design, a simple main() method lets you:
- Quickly see what your data structures contain
- Try operations and observe results immediately
- Understand behavior before committing to a design
Once you understand what you're building, then you write proper tests. But for initial exploration? main() may be your friend.
Feel free to modify the main() method to test your own scenarios!
Part 2 exercises are manually verified - as long as you put some effort in, you will get marks. Lab leaders will discuss your choices at the sync point.
🔄 Sync Point 2
Lab leaders will pause here:
- Ask groups: "What collection did you use for Scenario A? B? C?"
- Discuss tradeoffs: HashMap for fast lookup, HashSet for uniqueness checking, ArrayList vs LinkedList
- Quick poll: "Who had a different approach that also works?"
Part 3: Performance Showdown (10 minutes)
Let's measure the performance difference between collection types. You'll compare how long it takes to build different collections and to look up elements in them.
The Challenge
With 10,000 devices:
- How long does it take to build each collection type?
- How long does it take to find a device by ID?
Exercise 3.1: Implement the Collection Builders
Complete these methods in PerformanceExercises.java:
Build an ArrayList:
public static ArrayList<IoTDevice> buildArrayList(List<IoTDevice> devices) {
    ArrayList<IoTDevice> list = new ArrayList<>();
    // TODO: Add all devices to the ArrayList
    return list;
}
Build a LinkedList:
public static LinkedList<IoTDevice> buildLinkedList(List<IoTDevice> devices) {
    LinkedList<IoTDevice> list = new LinkedList<>();
    // TODO: Add all devices to the LinkedList
    return list;
}
Build a HashMap:
public static HashMap<String, IoTDevice> buildHashMap(List<IoTDevice> devices) {
    HashMap<String, IoTDevice> map = new HashMap<>();
    // TODO: Add all devices, using device ID as the key
    return map;
}
Exercise 3.2: Implement the Lookup Methods
public static IoTDevice findInArrayList(ArrayList<IoTDevice> devices, String targetId) {
    // TODO: Loop through the list, check each device's ID
    // Return the device if found, null otherwise
}

public static IoTDevice findInLinkedList(LinkedList<IoTDevice> devices, String targetId) {
    // TODO: Loop through the list, check each device's ID
    // Return the device if found, null otherwise
}

public static IoTDevice findInHashMap(HashMap<String, IoTDevice> deviceMap, String targetId) {
    // TODO: Look up the device directly by ID
}
Exercise 3.3: Run the Performance Test
The starter code includes a runPerformanceComparison() method that:
- Generates 10,000 devices using
DeviceGenerator - Times how long it takes to build each collection
- Performs 1,000 lookups and measures the time
Run the performance test:
# macOS/Linux
./gradlew runPart3

# Windows
.\gradlew.bat runPart3
Record your results:
| Collection | Time to Build (10K devices) | Time for 1,000 Lookups |
|---|---|---|
| ArrayList | ___ ms | ___ ms |
| LinkedList | ___ ms | ___ ms |
| HashMap | ___ ms | ___ ms |
Exercise 3.4: Analyze the Results (Reflection)
This is a reflection exercise—no additional code required! Answer these questions in your REFLECTION.md:
- Which was fastest to build? Which was fastest to look up?
- Why is HashMap lookup faster than ArrayList/LinkedList?
- For the build times: Were ArrayList and LinkedList similar? Why or why not?
- If you only needed to look up devices once, would a HashMap still be worth it?
🔄 Sync Point 3
Lab leaders will lead a discussion:
- Share results across the room—are they consistent?
- Discuss Big-O: O(n) vs O(1) lookup, O(n) build for all
Reflection
Complete the REFLECTION.md file with your answers to:
-
Polymorphism: In your
SmartHomeController, why didn't you need to write anyinstanceofchecks? What would happen if a new device type (likeSmartThermostat) were added to the codebase? -
Collections: For one of the scenarios in Part 2, explain why your chosen collection type was the best fit.
-
Performance: Record your timing results table from Exercise 3.3, and answer the analysis questions from Exercise 3.4.
-
Collaboration: Did you and your neighbor have different approaches in today's lab? How did you resolve disagreements? What did you learn from discussing with someone who thought differently?
Optional Extensions
If you finish early, try one or more of these challenges:
Stretch Goal 1: Performance Deep Dive
Modify the performance test to explore further:
-
Vary collection size: Test with 1,000, 10,000, and 100,000 devices. How does each approach scale? Does the relative performance change?
-
Insertion at different positions: Measure time to insert 1,000 devices at the beginning vs the end of an ArrayList vs a LinkedList. Explain the differences.
-
Iteration performance: Measure how long it takes to iterate through all 10,000 devices in ArrayList vs LinkedList. Which is faster? Why? (Hint: think about memory layout)
Add your findings to REFLECTION.md under "Optional: Performance Deep Dive."
Stretch Goal 2: Design Patterns Analysis
The starter code includes a CeilingFanWithLight class that uses composition—it has a Light and has a Fan rather than trying to be both.
- Read through
CeilingFanWithLight.java - Answer in
REFLECTION.md:- Why doesn't
CeilingFanWithLightextend bothLightandFan? - What's the advantage of the composition approach?
- What's a disadvantage?
- When would inheritance be a better choice than composition?
- Why doesn't
Stretch Goal 3: Generic Methods
Implement this generic method in StretchExercises.java:
/**
 * Filters a list of devices to return only those of a specific type.
 *
 * Example usage:
 *   List<Light> lights = filterByType(allDevices, Light.class);
 *   List<Fan> fans = filterByType(allDevices, Fan.class);
 *
 * @param devices the list of devices to filter
 * @param type the class object representing the desired type
 * @return a new list containing only devices of the specified type
 */
public static <T extends IoTDevice> List<T> filterByType(
        List<IoTDevice> devices,
        Class<T> type) {
    // TODO: Implement this method
    // Hint: Use type.isInstance(device) to check if a device matches
}
Test your implementation:
List<IoTDevice> allDevices = DeviceGenerator.generateMixedDevices(100);
List<Light> lights = filterByType(allDevices, Light.class);
List<Fan> fans = filterByType(allDevices, Fan.class);
System.out.println("Found " + lights.size() + " lights and " + fans.size() + " fans");
Submission Checklist
Due: By the end of your lab section (with a 10-minute grace period).
You may resubmit up to 5 times during the lab session. Push your work regularly—Pawtograder will test your code each time you push. This lets you catch issues early and get feedback as you work.
Before your final submission, ensure:
- Part 1: You've implemented
SmartHomeControllerand written JUnit tests for it - Part 2: You've fixed the generics bug and implemented all 3 collection scenarios
- Part 3: You've implemented the build and lookup methods, and recorded timing results
-
REFLECTION.mdis complete with all required answers - All tests pass:
./gradlew test(Windows:.\gradlew.bat test) - Your code compiles:
./gradlew build(Windows:.\gradlew.bat build) - All changes are committed and pushed to GitHub