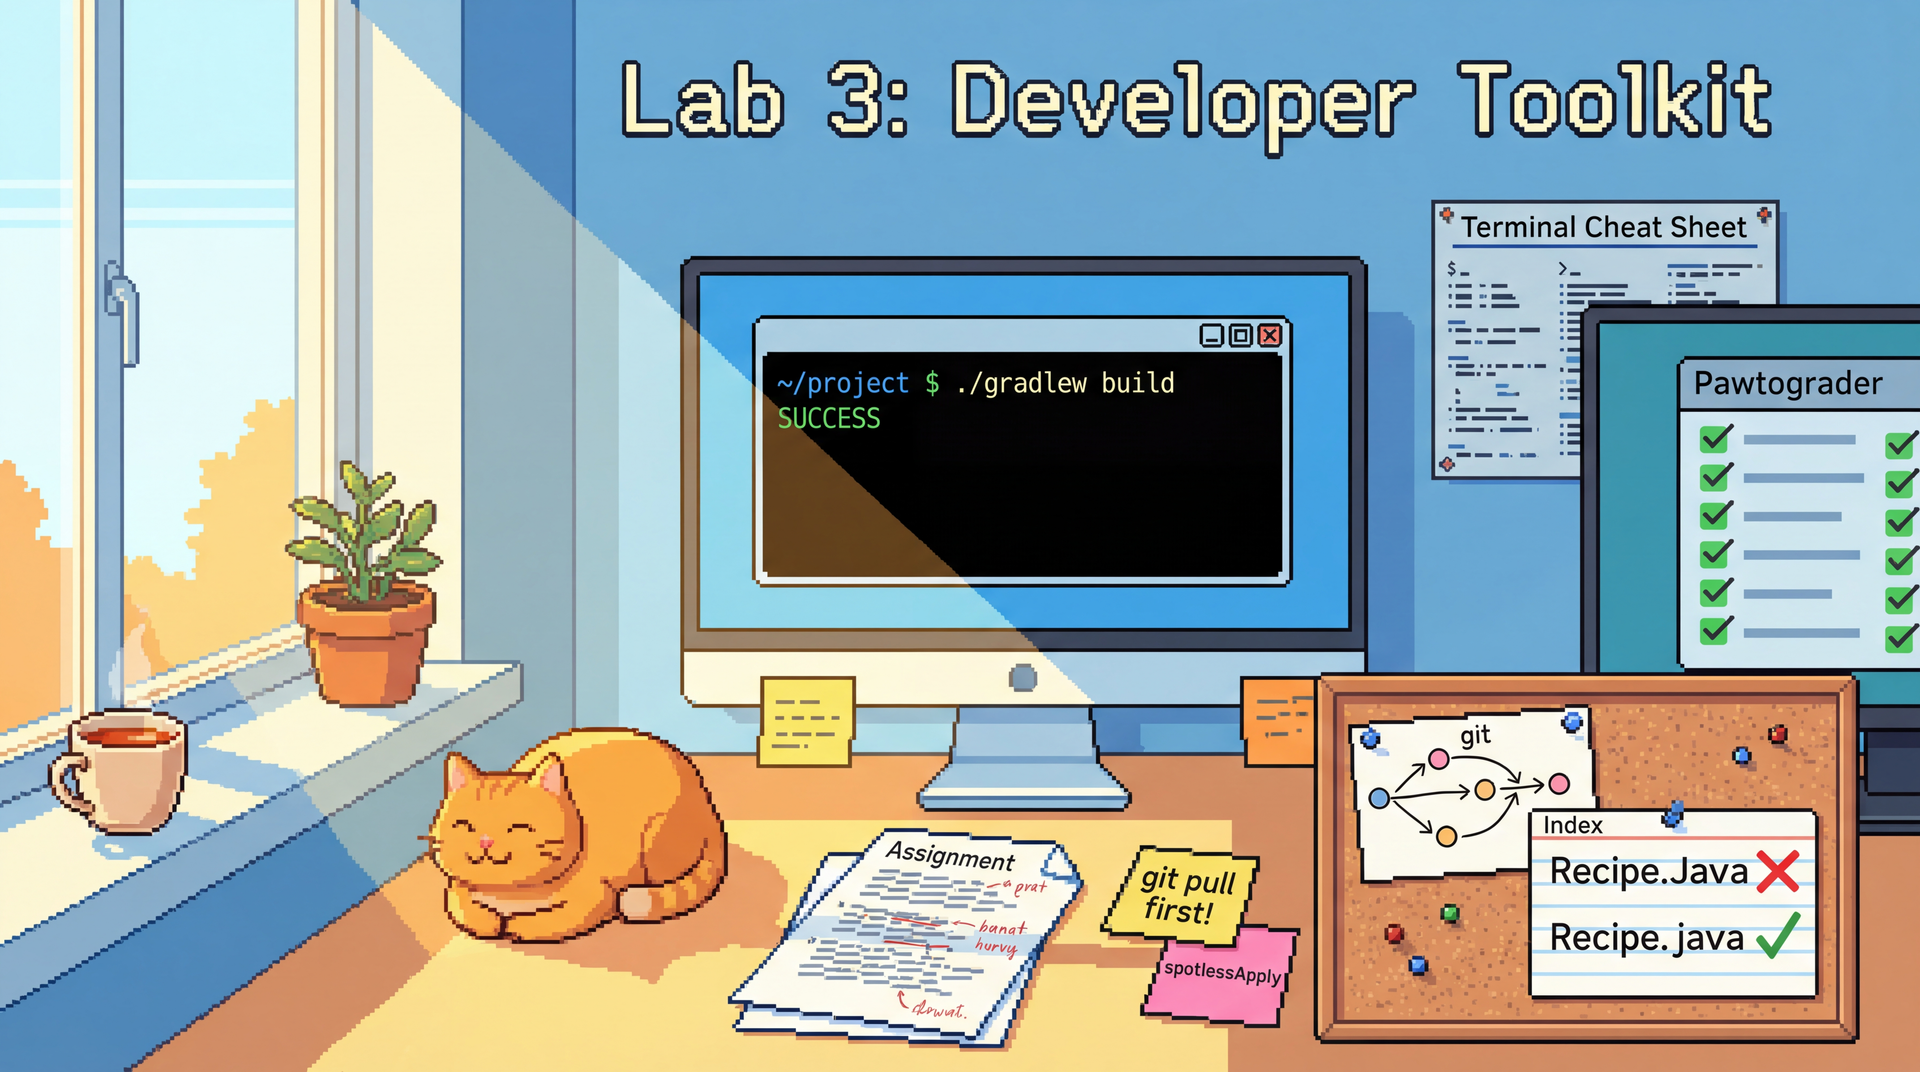
Lab 3: Developer Toolkit
Students come to CS3100 from many different paths. Some transferred from other universities. Some took CS2100, and others took CS2510. Some learned Python but not Java. Some are command-line wizards; others have never opened a terminal. We're all starting from different places, and we're all learning about where each other have come from.
That's all fine. But software engineering requires a baseline fluency with tools—terminals, version control, build systems, IDEs—that isn't always explicitly taught. We've assumed too much in the past, and we'd rather fill any gaps now than have tools get in the way of learning design.
Consider this lab an interlude before Assignment 2: a chance to ensure everyone has the same foundation, regardless of where you started.
You MUST complete ALL of the following to receive credit for this lab:
- Open a help request in the "Lab 3 Testing" queue on Pawtograder (Part 5)
- Make a discussion forum post (Part 6)
- Complete
REFLECTION.mdwith thoughtful answers - Push your work to GitHub before the deadline
Due: Oakland: during your lab session. Boston: by end of week.
The autograder will run and give you points, but passing all autograder tests is NOT required to receive credit for this lab. As long as you complete the checklist above with good-faith effort, you'll receive full credit. Don't stress about getting every answer perfect—focus on learning the tools.
- Boston (Asynchronous)
- Oakland (In-Person)
Boston students: You'll complete this lab on your own time. That makes this the perfect opportunity to practice a crucial skill: using office hours effectively.
If you get stuck on anything—a command that doesn't work, a concept that's unclear, a tool that's misbehaving—come to office hours. TAs are available throughout the week specifically to help with exactly these kinds of issues. Don't spend hours frustrated when a 5-minute conversation could unblock you.
Finding and using office hours is part of the learning in this lab.
Oakland students: You'll complete this lab during your scheduled lab section with TAs available to help.
Take advantage of having TAs in the room! If you get stuck on anything—a command that doesn't work, a concept that's unclear, a tool that's misbehaving—raise your hand. Don't spend 20 minutes frustrated when a 2-minute conversation could unblock you.
Work with your neighbors. Compare notes. If someone near you figures something out, ask them to explain it.
Every semester, students spend hours debugging why the autograder "can't find" their file. They check their code, rewrite their logic, question their understanding of Java—when the real culprit is something like:
MeasuredIngredient.Java instead of MeasuredIngredient.java
Java is case-sensitive. File extensions matter. Details matter.
This kind of issue isn't about skill level—it's about knowing where to look. It regularly stumps the professors. This lab teaches you to see what's actually happening in your development environment, so you can spend your time on the interesting problems.
Learning Objectives
By the end of this lab, you will be able to:
- Navigate and interpret CS3100 assignment specifications effectively
- Use Pawtograder to check your submission status and understand autograder feedback
- Execute essential terminal commands for navigating your file system and using git
- Configure VS Code for Java development and use its git integration
- Run Gradle commands and interpret build/test output
- Ask effective questions on the discussion forum
Before You Begin
Prerequisites: Complete Labs 1-2. Assignment 1 experience is helpful but not required.
Clone the Lab Repository: Clone your lab3 repository from Pawtograder.
Never put your Java projects in folders synced by OneDrive, iCloud, Dropbox, Google Drive, or similar services. These sync tools do not play nicely with Java development tools and git.
Symptoms of this problem:
- Random build failures that fix themselves
- Files mysteriously changing or disappearing
- Git showing hundreds of unexpected modified files
- IDE errors about locked files
Where to put your projects instead:
- Windows:
C:\Users\YourName\cs3100\(not inDocumentsif that syncs to OneDrive) - Mac:
~/cs3100/or~/Developer/cs3100/
If you've already cloned to a synced folder, move your project now before continuing.
Part 1: Reading Assignments Like a Detective (15 minutes)
The most common source of lost points isn't bugs in your code—it's misunderstanding what the assignment is asking for. Let's develop some detective skills.
Exercise 1.1: Anatomy of an Assignment Specification
Open the Assignment 1 specification in another tab. Let's dissect its structure:
Every CS3100 assignment has these key sections:
| Section | What It Tells You |
|---|---|
| Overview | The big picture—what you're building and why |
| Learning Outcomes | Skills being assessed (hint: this is what we grade!) |
| Technical Specifications | Exact requirements, method signatures, expected behavior |
| Invariants and Contracts | Preconditions, postconditions, exceptions |
| Testing Overview | What tests you need to write |
| Grading Rubric | Exactly how points are allocated |
Your task: In the starter code, open exercises/Part1Exercises.java. Answer the questions by filling in the string constants. These questions test whether you can find specific information in the Assignment 1 spec.
public class Part1Exercises {
    // Question 1: According to the spec, what exception should ExactQuantity's
    // constructor throw if the amount is not positive?
    public static final String Q1_EXCEPTION_TYPE = ""; // Fill this in

    // Question 2: What is the DECIMAL_PRECISION constant value required for
    // ExactQuantity and RangeQuantity?
    public static final int Q2_DECIMAL_PRECISION = 0; // Fill this in

    // Question 3: According to the grading rubric, how many points is
    // FractionalQuantityTest worth?
    public static final int Q3_FRACTIONAL_TEST_POINTS = 0; // Fill this in

    // Question 4: What annotation does the spec say eliminates the need to
    // test for null parameter exceptions?
    public static final String Q4_NULL_ANNOTATION = ""; // Fill this in

    // Question 5: In the toString() for FractionalQuantity, what format is used
    // when whole > 0 AND numerator > 0? (Copy the exact format string from spec)
    public static final String Q5_TOSTRING_FORMAT = ""; // Fill this in
}
Exercise 1.2: Reading Instructor Tests
When instructor tests are available, they're a goldmine of information about expected behavior.
Open src/test/java/exercises/SampleInstructorTest.java in the lab repository. This simulates the kind of tests the autograder runs.
Answer these questions in exercises/Part1Exercises.java:
    // Question 6: Looking at the sample instructor test, what value does
    // testExactQuantityToStringFormatting expect for 2.5 cups?
    public static final String Q6_EXPECTED_OUTPUT = ""; // Fill this in

    // Question 7: What assertion method is used to verify exceptions are thrown?
    public static final String Q7_ASSERTION_METHOD = ""; // Fill this in
Exercise 1.3: Using Pawtograder Effectively
Navigate to Pawtograder and find your Assignment 1 submission (or Lab 1/2 if you haven't submitted A1).
Explore these features:
-
Submission History: Click on your assignment to see all submissions. Note the timestamps and scores.
-
Autograder Output: Expand a submission to see the detailed test results. Each failing test shows:
- The test name (tells you what's being tested)
- Expected vs. actual output (tells you what went wrong)
- Sometimes a hint (if configured by the instructor)
Fill in exercises/Part1Exercises.java:
    // Question 8: In Pawtograder, what is the maximum number of submissions
    // allowed per day for Assignment 1?
    public static final int Q8_MAX_SUBMISSIONS = 0; // Fill this in

    // Question 9: True or false: Pawtograder shows you hints about bugs your
    // tests didn't catch (one per submission).
    public static final boolean Q9_HINTS_AVAILABLE = false; // Fill this in
Part 2: Terminal Mastery (20 minutes)
The terminal is your direct line to the computer. Mastering basic commands will save you hours of frustration.
Opening a Terminal in VS Code
Before we dive into commands, let's make sure you can open a terminal properly.
Keyboard shortcut: Press Ctrl+` (backtick, the key above Tab) or Cmd+` on Mac.
You can also use the menu: View → Terminal
This is important! Windows has multiple terminal options, and the default (PowerShell) uses different commands than Mac/Linux. For this course, use Git Bash so your commands match what we teach.
To check which shell you're using: Look at the dropdown in the terminal panel. It might say "powershell", "cmd", or "bash".
To switch to Git Bash:
- Click the dropdown arrow next to the
+button in the terminal panel - Select Git Bash
To make Git Bash your default (recommended):
- Press
Ctrl+Shift+Pto open the Command Palette - Type "Terminal: Select Default Profile"
- Select Git Bash
- Close and reopen your terminal — it should now default to Git Bash
If you don't see Git Bash as an option, you may need to install Git for Windows from git-scm.com.
Verify your terminal is working: Type pwd and press Enter. You should see your current directory path. If you see an error like "'pwd' is not recognized", you're in PowerShell or CMD — switch to Git Bash.
Essential Commands Reference
Here's your survival guide to terminal commands:
| Command | What It Does | Example |
|---|---|---|
pwd | Print Working Directory - shows where you are | pwd → /Users/yourname/cs3100/sp26-lab3-your-username |
ls | List files in current directory | ls → shows files and folders |
ls -la | List ALL files (including hidden) with details | ls -la → shows .git, permissions, dates |
cd <path> | Change Directory | cd src/main/java |
cd .. | Go up one directory level | cd .. → from /src/main to /src |
cd ~ | Go to your home directory | cd ~ → /Users/yourname |
cd - | Go to previous directory | cd - → back where you were |
cat <file> | Display file contents | cat README.md |
mkdir <name> | Make a new directory | mkdir my-folder |
touch <file> | Create an empty file | touch NewFile.java |
mv <src> <dst> | Move or rename a file | mv Wrong.Java Correct.java |
rm <file> | Remove a file (careful!) | rm unwanted.txt |
clear | Clear the terminal screen | clear |
Exercise 2.1: Navigation Challenge
Open a terminal in VS Code (you set this up in the previous section).
Complete these tasks and record your answers:
# 1. Print your current working directory
pwd

# 2. What is the output? Record it in Part2Exercises.java

# 3. List all files including hidden ones
ls -la

# 4. You should see a .git folder. What does this indicate?
# Record your answer in Part2Exercises.java

# 5. Navigate to the src/main/java directory
cd src/main/java

# 6. Now navigate back to the project root in ONE command
# (Hint: you can use multiple .. separated by /)
Fill in exercises/Part2Exercises.java:
public class Part2Exercises {
    // Question 1: What command shows your current directory?
    public static final String Q1_PWD_COMMAND = ""; // Fill this in

    // Question 2: What does the .git folder indicate about a directory?
    public static final String Q2_GIT_FOLDER_MEANING = ""; // Fill this in

    // Question 3: What command navigates up two directory levels?
    public static final String Q3_UP_TWO_LEVELS = ""; // Fill this in
}
Exercise 2.2: Git Concepts and Commands
While VS Code's git integration is convenient, understanding command-line git is essential for debugging issues. Let's start with some key concepts.
What Is Git?
Git is a version control system — it tracks changes to your files over time, letting you:
- See what changed and when
- Undo mistakes by going back to earlier versions
- Collaborate with others without overwriting each other's work
- Submit your work (Pawtograder pulls from your GitHub repository)
The Three States of a File
Git files exist in one of three states:
[Working Directory] --git add--> [Staging Area] --git commit--> [Repository]
     (Modified)                    (Staged)                      (Committed)
- Modified (Working Directory): You've changed the file, but git hasn't recorded the change yet
- Staged (Staging Area): You've marked the file to be included in your next commit
- Committed (Repository): The change is safely stored in your local git history
Why staging? It lets you commit only some of your changes. Maybe you fixed a bug AND started a new feature — you can stage and commit just the bug fix, keeping your commits focused.
Branches
A branch is like a parallel universe for your code. The default branch is usually called main.
main:     A---B---C
               \
feature:        D---E  (your work here)
For this course, you'll mostly work on this default main branch. When you push commits to this main branch in this class, the latest commit will automatically be submitted for grading. If you want to push your code to GitHub without creating a submission, create and work on a separate branch. Use git branch to see which branch you're on (the current branch has a * next to it).
We'll return to discuss branching in greater detail when we get closer to the group project. In the meantime, for more information on creating branches please see Geeks for Geeks on Git Branching
Essential Git Commands
| Command | What It Does | When to Use |
|---|---|---|
git status | Shows modified/staged files | Before committing — see what changed |
git add <file> | Stage a file for commit | After modifying files you want to commit |
git add . | Stage ALL modified files | When you want to commit everything |
git commit -m "msg" | Create a commit with message | After staging, to save your changes |
git push | Upload commits to GitHub | After committing, to share/submit |
git pull | Download changes from GitHub | Before starting work, to get updates |
git log --oneline | Show commit history (compact) | To see what commits exist |
git diff | Show unstaged changes | To see what you modified |
git branch | List branches | To see what branch you're on |
git clone <url> | Download a repository | To get a repo for the first time |
Complete the Git Challenge
- Make a small change to
exercises/Part2Exercises.java(fill in an answer) - Run each command and observe the output:
# Check the status - what does it show?
git status

# Stage your change
git add exercises/Part2Exercises.java

# Check status again - what changed?
git status

# Commit with a message
git commit -m "Complete Part 2 exercises"

# Push to GitHub
git push
Exercise 2.3: Dealing with Git Rejections
One of the most frustrating git experiences is a rejected push. Let's understand why this happens and how to fix it.
Why pushes get rejected:
! [rejected]        main -> main (fetch first)
error: failed to push some refs to 'github.com:...'
hint: Updates were rejected because the remote contains work that you do
hint: not have locally.
This means someone (or you from another computer, or the autograder) pushed changes that you don't have locally.
The fix:
# First, pull the remote changes
git pull

# If there are conflicts, you'll need to resolve them
# (VS Code will highlight conflicts in files)

# After resolving, commit the merge
git add .
git commit -m "Merge remote changes"

# Now push should work
git push
Record your understanding in Part2Exercises.java:
    // Question 4: What command downloads changes from GitHub without merging?
    public static final String Q4_FETCH_COMMAND = ""; // Hint: git fetch

    // Question 5: What TWO commands can fix a rejected push? (separate with comma)
    public static final String Q5_FIX_REJECTION = ""; // e.g., "git pull, git push"
Exercise 2.4: Finding Your Java Version
A common source of build errors is having the wrong Java version. This course uses Java 21. If you don't have Java 21 installed, see Lab 1: Java Setup for installation instructions.
Try running this command in your terminal:
# Check your Java version
java -version
You should see output like:
openjdk version "21.0.2" 2024-01-16
...
The important part is that it starts with 21. If you see a different major version (like 17, 11, or 8), you need to install Java 21.
# Check your JAVA_HOME environment variable
# Mac/Linux/Git Bash:
echo $JAVA_HOME

# This should point to your Java 21 installation
Record in Part2Exercises.java:
    // Question 6: What Java version is this course using? (Just the major version number)
    public static final int Q6_JAVA_VERSION = 0; // Fill this in

    // Question 7: What environment variable points to your Java installation?
    public static final String Q7_JAVA_ENV_VAR = ""; // Fill this in
If any git command gives you an unexpected error, or you're confused about what a command does, this is a perfect office hours question. Bring your laptop, show the TA what you tried, and they'll help you understand what's happening.
Can't make office hours? Post your question to the Lab 3 discussion topic on Pawtograder. Include what command you ran and what error you saw. Classmates and TAs monitor the forum and can often help quickly. You can post using your real name or your pseudonym—whichever you're comfortable with.
Part 3: VS Code Deep Dive (15 minutes)
VS Code is more than a text editor—it's a powerful IDE when properly configured.
Exercise 3.1: Opening Projects Correctly
The Two Most Common VS Code Mistakes:
- Opening a file instead of a folder: Using
File → Open Fileinstead ofFile → Open Folder - Opening the wrong folder: Opening your
cs3100directory (which contains multiple projects) instead of the specific project folder likesp26-lab3-yourUsername
Why this matters:
- Without the folder open, VS Code can't find your
build.gradle - Java extension can't understand your project structure, so it can't provide features like:
- Git integration
- Autocomplete and error highlighting
Test yourself:
- Close VS Code completely
- Open VS Code
- Go to
File → Open Folder(NOT Open File!) - Navigate to your lab3 directory and select it
- You should see the full project tree in the Explorer sidebar
In exercises/Part3Exercises.java:
public class Part3Exercises {
    // Question 1: What VS Code menu option should you use to open a project?
    public static final String Q1_OPEN_PROJECT = ""; // Fill this in

    // Question 2: What file in your project root tells VS Code this is a Gradle project?
    public static final String Q2_GRADLE_FILE = ""; // Fill this in
}
Exercise 3.2: Terminal Tips in VS Code
You already learned to open and configure the terminal in Part 2. Here are a few more tips:
Multiple terminals: Click the + icon in the terminal panel to open additional terminals. Useful when you want one terminal running ./gradlew test --continuous while you edit code in another.
See VS Code Terminal Basics for more.
Split terminals: Click the split icon to see two terminals side-by-side.
Terminal history: Press the up arrow to cycle through previous commands. This saves a lot of retyping!
Record in Part3Exercises.java:
    // Question 3: What keyboard shortcut opens the integrated terminal?
    public static final String Q3_TERMINAL_SHORTCUT = ""; // Fill this in

    // Question 4: On Windows, what shell do we recommend for CS3100?
    public static final String Q4_RECOMMENDED_SHELL = ""; // Fill this in
Exercise 3.3: Source Control Panel
VS Code's Source Control panel provides a visual interface to git.
Find the Source Control panel: Click the branch icon in the left sidebar (or press Ctrl+Shift+G)
Explore these features:
- Changed files: Listed under "Changes" - click to see a diff
- Staging: Click the
+next to a file to stage it - Commit: Type a message in the box at the top, click the checkmark
- Push/Pull: Click the
...menu for more git operations - Branch indicator: Bottom-left of VS Code shows your current branch
Make another change and commit using only the VS Code interface:
- Modify
Part3Exercises.java(fill in more answers) - Go to Source Control panel
- Stage your changes (click the +)
- Enter a commit message
- Click the checkmark to commit
- Click "Sync Changes" to push
Record in Part3Exercises.java:
    // Question 5: What keyboard shortcut opens the Source Control panel?
    public static final String Q5_SOURCE_CONTROL_SHORTCUT = ""; // Fill this in

    // Question 6: Where in VS Code can you see your current git branch?
    public static final String Q6_BRANCH_LOCATION = ""; // Fill this in
Exercise 3.4: Useful Keyboard Shortcuts
Master these shortcuts to navigate code faster:
| Shortcut (Mac) | Shortcut (Windows) | Action |
|---|---|---|
Cmd+P | Ctrl+P | Quick Open file by name |
Cmd+Shift+P | Ctrl+Shift+P | Command Palette |
Cmd+Shift+F | Ctrl+Shift+F | Search across all files |
Cmd+B | Ctrl+B | Toggle sidebar |
Cmd+`` | Ctrl+`` | Toggle terminal |
F12 | F12 | Go to Definition |
Cmd+Click | Ctrl+Click | Go to Definition (mouse) |
Shift+F12 | Shift+F12 | Find All References |
Cmd+G | Ctrl+G | Go to Line |
Practice: Use Cmd/Ctrl+P and type "Part3" to quickly open Part3Exercises.java.
Part 4: Gradle Demystified (15 minutes)
Gradle is the build system that compiles your code, runs tests, and packages your application. Understanding it will save you hours of debugging.
What Is Gradle?
Think of Gradle as your project's "chef":
- Recipes (
build.gradle): Instructions for how to build your project - Ingredients (dependencies): Libraries your project needs
- Kitchen (Gradle daemon): The runtime that executes tasks
- Dishes (outputs): Compiled classes, test reports, bundles of your app
Exercise 4.1: Essential Gradle Commands
Run each command and observe what happens:
# Compile your code (but don't run tests)
./gradlew compileJava

# Run all tests
./gradlew test

# Run both compile and test (and other checks)
./gradlew build

# Clean all build outputs (useful when things are weird)
./gradlew clean

# Clean AND build (fresh start)
./gradlew clean build

# See all available tasks
./gradlew tasks
Record in exercises/Part4Exercises.java:
public class Part4Exercises {
    // Question 1: What Gradle command compiles code AND runs tests?
    public static final String Q1_BUILD_COMMAND = ""; // Fill this in

    // Question 2: What Gradle command removes all previous build outputs?
    public static final String Q2_CLEAN_COMMAND = ""; // Fill this in

    // Question 3: Why use ./gradlew instead of just gradle?
    public static final String Q3_WHY_WRAPPER = ""; // Fill this in (hint: consistency)
}
Exercise 4.2: Reading Gradle Errors
Gradle errors can be intimidating, but they follow a pattern. Let's learn to decode them by creating an error ourselves.
Step 1: Break something on purpose
Open any Java file in your project (for example, Part4Exercises.java) and introduce a syntax error:
- Remove a semicolon from the end of a line, or
- Delete a closing brace
}, or - Misspell a keyword like
public→pubic
Step 2: Run the build
./gradlew compileJava
You'll see an error! Take a moment to read it carefully.
Anatomy of a Gradle error:
- Task that failed:
:compileJava- tells you compilation failed - File and line number: Shows exactly which file and line has the problem
- Error message: Describes what's wrong (e.g.,
';' expected) - The caret (^): Points to exactly where the error was detected
Step 3: Record your observation
In Part4Exercises.java, record what you observed:
    // Question 4: What syntax error did you introduce?
    public static final String Q4_ERROR_INTRODUCED = ""; // e.g., "removed semicolon on line 5"

    // Question 5: Copy the key part of the error message Gradle showed you
    public static final String Q5_ERROR_MESSAGE = ""; // e.g., "';' expected"
Step 4: Fix the error
Restore the code to its working state and run ./gradlew compileJava again to verify it succeeds.
Exercise 4.3: Understanding Test Output
Run the tests:
./gradlew test
If tests fail, Gradle shows you where to find the detailed report:
FAILURE: Build failed with an exception.

* What went wrong:
Execution failed for task ':test'.
> There were failing tests. See the report at: file:///Users/you/project/build/reports/tests/test/index.html
To view the report: Copy the file:///... URL from the terminal output and paste it into your web browser's address bar. The report will open showing detailed test results.
The test report shows:
- Overall pass/fail summary
- Each test class and its tests
- For failures: the expected vs. actual values
- Stack traces showing exactly where the failure occurred
Record in Part4Exercises.java:
    // Question 6: Where does Gradle put the HTML test report?
    public static final String Q6_TEST_REPORT_PATH = ""; // Fill this in

    // Question 7: What Gradle command runs ONLY the tests (not other checks)?
    public static final String Q7_TEST_ONLY_COMMAND = ""; // Fill this in
Exercise 4.4: Targeted Test Running
You don't always need to run ALL tests. Here's how to run specific tests:
# Run tests in a specific class
./gradlew test --tests "exercises.Part1ExercisesTest"

# Run a specific test method
./gradlew test --tests "exercises.Part1ExercisesTest.testQuestion1"

# Run tests matching a pattern
./gradlew test --tests "*Part*"
Exercise 4.5: Writing Tests That Catch Bugs
On assignments, you don't just write code—you write tests. And Pawtograder doesn't just check if your tests pass on correct code. It checks if your tests catch bugs.
Here's how it works: Pawtograder runs your tests against the correct implementation (they should pass), then runs them against intentionally buggy implementations (they should fail). If your tests pass on buggy code, they're not catching the bugs they're supposed to catch.
You can simulate this yourself! This is exactly how you should verify your tests work:
- Write your answer (e.g., fill in
Q2_DECIMAL_PRECISION = 3in Part1Exercises.java) - Write a test that checks the answer
- Intentionally break your answer (e.g., change it to
Q2_DECIMAL_PRECISION = 5) - Run your test — it should now FAIL
- Fix your answer back to the correct value
- Run your test again — it should PASS
If your test passes even when the answer is wrong, your test isn't actually testing anything useful!
Your task: Open src/test/java/exercises/Part1ExercisesTest.java. You'll see a starter test file. Implement these tests:
@Test
void testDecimalPrecisionIsCorrect() {
    // TODO: Write a test that verifies Q2_DECIMAL_PRECISION has the correct value
    // Hint: Use assertEquals(expected, Part1Exercises.Q2_DECIMAL_PRECISION)
}

@Test
void testExceptionTypeIsCorrect() {
    // TODO: Write a test that verifies Q1_EXCEPTION_TYPE has the correct value
}
After writing each test:
- Run
./gradlew test— your test should PASS - Change your answer in
Part1Exercises.javato something wrong - Run
./gradlew testagain — your test should now FAIL - Change your answer back to the correct value
If your test didn't fail when the answer was wrong, your test isn't checking what you think it's checking. Fix it!
On assignments, Pawtograder uses "mutation testing" — it introduces small bugs into correct code and checks if your tests catch them. You earn test points by catching these bugs.
The workflow above is exactly how you can verify your tests locally before submitting. Don't just check that tests pass — check that they fail when they should!
Exercise 4.6: Code Quality Tools (NullAway and Spotless)
CS3100 projects include two code quality tools that run automatically when you build. These tools catch common bugs and enforce consistent formatting—but they can be confusing if you don't know what they're telling you.
Spotless: Code Formatting
Spotless automatically checks that your code follows a consistent style (indentation, spacing, line breaks, etc.). When Spotless fails, you'll see something like:
> Task :spotlessJavaCheck FAILED
The following files had format violations:
    src/main/java/exercises/Part1Exercises.java
The fix is simple: Run the auto-formatter:
./gradlew spotlessApply
This automatically reformats your code. Then commit the changes. That's it!
Pro tip: Run spotlessApply before every commit to avoid formatting failures. The handout repository should automatically configure VSCode to run this on every save for you too - if it doesn't, feel free to drop in to office hours or post on the forum for troubleshooting help - this can be a very helpful feature!
NullAway: Null Safety
NullAway helps prevent NullPointerException — one of the most common Java bugs. It analyzes your code to find places where you might accidentally use null.
When NullAway fails, you'll see something like:
> Task :compileJava FAILED
error: [NullAway] returning @Nullable expression from method with @NonNull return type
    return ingredient.getName();
           ^
Common NullAway errors and fixes:
| Error | What It Means | How to Fix |
|---|---|---|
returning @Nullable expression from @NonNull method | Your method promises to never return null, but it might | Add a null check, or change the return type to @Nullable |
dereferencing expression that is @Nullable | You're calling a method on something that might be null | Add a null check before using it: if (x != null) { x.doThing(); } |
passing @Nullable parameter where @NonNull is required | A method requires a non-null argument, but you're passing something that might be null | Check for null first, or ensure the value is never null |
Example fixes:
// ❌ NullAway error: ingredient might be null
public String getIngredientName() {
    return ingredient.getName();  // Error if ingredient is null!
}

// ✅ Option 1: Check for null and provide a default
public String getIngredientName() {
    if (ingredient == null) {
        return "Unknown";
    }
    return ingredient.getName();
}

// ✅ Option 2: Assert non-null with Objects.requireNonNull
// Use this when null would be a bug (e.g., in a constructor)
public Recipe(String name, Ingredient ingredient) {
    this.name = Objects.requireNonNull(name, "name cannot be null");
    this.ingredient = Objects.requireNonNull(ingredient, "ingredient cannot be null");
}
Objects.requireNonNull() tells NullAway "I guarantee this isn't null" and throws a helpful NullPointerException with your message if it ever is. Use it in constructors and at method entry points where null would be a programming error, not a normal case to handle.
Record in Part4Exercises.java:
    // Question 8: What Gradle command auto-fixes formatting issues?
    public static final String Q8_FORMAT_COMMAND = ""; // Fill this in

    // Question 9: What common Java exception does NullAway help prevent?
    public static final String Q9_NULLAWAY_PREVENTS = ""; // Fill this in
Gradle errors can be cryptic. If you're stuck on a build error for more than 15 minutes, bring it to office hours. TAs have seen most common issues and can often spot the problem quickly. Come prepared with:
- The exact error message (screenshot or copy-paste)
- What command you ran
- What you've already tried
Can't make office hours? Post to the Lab 3 discussion topic on Pawtograder with the same information. You can use your real name or your pseudonym—whichever you prefer.
Part 5: Getting Help Effectively (5 minutes)
Knowing how to get unstuck is as important as knowing how to code. This section introduces you to the course's help queue system.
Exercise 5.1: Open a Test Help Request (Required!)
You must complete this exercise to receive credit for this lab. Opening a help request in the test queue verifies that you know how to use office hours when you need them.
Your task:
- Go to Pawtograder Office Hours
- Find and join the "Lab 3 Testing" queue
- Open a help request (you can write anything—"Testing the queue" is fine)
- The request will be automatically closed after a few days—you don't need to wait for a TA. TAs will not be responding to help requests in this queue. If you actually need help, please join the "TA Pool" queue.
In REFLECTION.md, answer these questions about your experience:
- Did you find the help queue easily?
- What information did the queue ask you to provide?
- How might you use office hours queues in the future when you're actually stuck?
Why This Matters
When you're stuck on an assignment, knowing exactly how to join office hours could be the difference between making progress and staying stuck. Practice now so you're ready when it counts. Your feedback on this lab also helps us to improve the office hours system so that it is even more useful when you are stuck.
Part 6: Community Engagement (10 minutes)
Software development is collaborative. Learning to ask good questions and help others is a crucial skill. This class has over 400 students, and the discussion forum is a great place to connect.
Exercise 6.1: Make a Forum Post (Required!)
You must complete this exercise to receive credit for this lab.
You MUST complete one of the following options to receive credit for this lab:
Option A: Ask a Question
Post a genuine question about something from Labs 1-3 or Assignment 1. A good question includes:
- What you're trying to do
- What you expected to happen
- What actually happened
- What you've already tried
Option B: Answer Someone's Question
Find a question from another student and provide a helpful response. A good answer:
- Directly addresses their question
- Explains the "why" not just the "what"
- Provides a concrete example or next step
Option C: Share a Tip You Learned
Post something useful you discovered while working on the course. For example:
- A VS Code shortcut that saved you time
- A git workflow that helped
- A debugging technique that worked
- A way to read the spec more effectively
Option D: Post a Course-Related Meme
Create or share a meme related to:
- Your Assignment 1 experience
- Common Java/git struggles
- The
.Javavs.javasituation - Build system frustrations
Post it in the #memes category. Humor helps us all cope!
Discussion Forum Best Practices
When asking questions:
❌ Bad: "My code doesn't work"
✅ Good: "My FractionalQuantity.toString() returns '1/2 cup' but the test expects '1/2 cups'. I've checked the spec section 5.3.6 and I think singular is correct for fractions. Am I misreading this?"
❌ Bad: "Can someone help me?"
✅ Good: "I'm getting a NullPointerException at line 42 of MeasuredIngredient.java when I call quantity.getUnit(). I've verified that I'm passing a non-null Quantity to the constructor. Here's my constructor code: [code snippet]"
When answering:
❌ Bad: "Just use .equals()"
✅ Good: "The issue is that you're using == to compare Strings, which checks if they're the same object in memory. Use .equals() instead, which compares the actual content. For example: if (name.equals(other.name)) instead of if (name == other.name)"
Show Appreciation with Likes
The discussion forum has a karma system. When someone posts a helpful answer, a useful tip, or a great meme—give it a like!
- Post karma: Earned when your original posts get likes
- Reply karma: Earned when your answers and comments get likes
Liking posts helps in several ways:
- It signals to others which answers are reliable
- It encourages helpful community members to keep contributing
- It helps TAs identify students who are actively helping their peers
Compete for bragging rights! The students with the most karma are recognized as top contributors. See if you can climb the leaderboard by posting thoughtful questions, helpful answers, and quality tips. Your anonymous pseudonym earns karma separately from your real name account - feel free to participate with either or both!
Record your post:
In REFLECTION.md, include a link to your forum post or a brief description of what you posted. Sorry, we don't yet handle screenshots in submissions.
Reflection
Complete REFLECTION.md with your answers to:
-
Assignment Navigation: What's one thing about reading assignment specifications that you'll do differently now?
-
Terminal Skills: Which terminal command do you think will be most useful for you going forward? Why?
-
The .Java Incident: Why do you think a file named
MeasuredIngredient.Javawouldn't be recognized by the Java compiler? What does this tell you about Java and file naming? -
Help Queue Experience: Describe your experience opening a help request in the "Lab 3 Testing" queue. (See Part 5)
-
Forum Contribution: Paste the link to your discussion forum post, or describe what you contributed.
-
Remaining Questions: What's one thing you're still confused about after this lab? (This helps us improve!)
Quick Reference Card
Print this or keep it handy!
Terminal Commands
pwd                 # Where am I?
ls -la              # What's here (including hidden)?
cd <path>           # Go somewhere
cd ..               # Go up one level
cd ~                # Go home
Git Commands
git status          # What's changed?
git add .           # Stage everything
git commit -m "msg" # Save changes locally
git push            # Upload to GitHub
git pull            # Download from GitHub
Gradle Commands
./gradlew build           # Compile + test + check
./gradlew test            # Just run tests
./gradlew clean build     # Fresh start
./gradlew compileJava     # Just compile
VS Code Shortcuts
| Action | Mac | Windows |
|---|---|---|
| Quick Open | Cmd+P | Ctrl+P |
| Command Palette | Cmd+Shift+P | Ctrl+Shift+P |
| Toggle Terminal | Cmd+`` | Ctrl+`` |
| Go to Definition | F12 | F12 |
| Source Control | Cmd+Shift+G | Ctrl+Shift+G |